

Building The Chumack Observatory
MPC Code # 838, Dayton Research Station.
“First 6 days of construction”
This 7’x7′ Observatory was constructed in only 8 days, with an occasional helping hand from my neighbor, the project was started and finished the first week in August of 1997.
I purchased a 6ft. fiberglass Homedome by Technical Innovations, and purchased the lumber and other materials from a local building supply.
Initially, I took some measurements and drew up a quick sketch for a 7’x 7′ building.
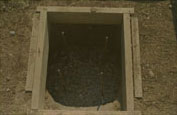
Center pier hole
Foundation
Getting a building permit was the easy part, digging the 4 foundation post holes (2ft Deep) and (3ft) center pier hole by hand with a shovel in rocky ground was by far the hardest part.

It took (5) 80LB bags of quickcrete and some gravel to fill the 3×3 ft. sq. center hole, where the telescope pier will eventually mount to and is totally isolated from the building.

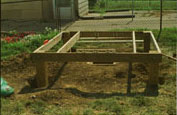
I embedded (4) 1/2-13 bolts into the wet concrete to later accommodate attaching the steel pier. Some 6×6 treated posts were used for the 4 support corners and 2×6 treated floor joists and joist hangers. The observatory floor will sit 18″ off the ground when complete to prevent moisture from building up. The 4 foundation post holes were leveled with simple gravel in the bottom and then filled back in with dirt.

It is was my intention to make it completely removable should I move in the future. The floor joists and corner posts were put together with 1/2 -13 Bolts and squared up. Then came the 3/4″ plywood floor with a 12″ hole in the center for the pier.
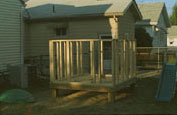
On top of this was the 2×4 framing for the walls, all set to 16″ centers, all 4 went up in less than an hour, and finally I attached the 5/8″ thick plywood for the outer walls with simple drywall screws and a cordless drill.
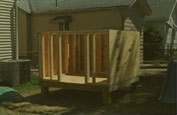
Once all the outer walls were up, I coated all the walls with 4 coats of wood sealer as an under coat for the final 2 coats of paint.

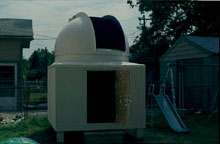
Now the circle to square transition skirt for the Homedome was laid over the building and attached via 24 lag bolts.

And the two dome halves ready to be placed on the building.

The Homedome base ring was attached via 1/4″ bolts and sealed with silicon sealer, this made way for final placement of the two dome haves which when in place will also bolt together. The dome halves ride on the wheels of the base ring.
On top of this was the 2×4 framing for the walls, all set to 16″ centers, all 4 went up in less than an hour, and finally I attached the 5/8″ thick plywood for the outer walls with simple drywall screws and a cordless drill.
The Shutter back bolts to both halves of the dome and the other two pieces of the shutter slide and nest together. The dome rotation motors & remote control were installed in about an hour.
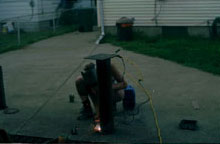
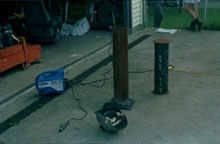
I found some old steel pipes and plates at a scrap Iron yard and Arc welded them together to make a 9″ diameter pier.

The door was constructed out of 2×6’s and 3/4″ plywood (very heavy duty) with dead bolts and knobs. Finally, the door & entire interior of the Observatory was sealed and painted a Royal Cobalt dark blue.
The Observatory was completely wired and is totally automated via underground cables to control computers within my office.
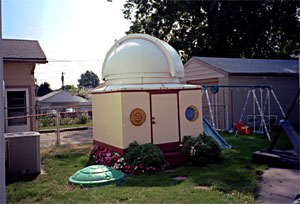
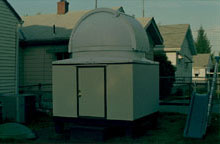
Homemade Backyard Observatory in Dayton
The Aftermath……
The building Inspectors were quite impressed, no problem getting this one approved.
A video monitoring system is also now in place for both video and CCD imaging remotely. And an alarm system was finally installed.
I even got the city to shield one of the local street lamps that was shining into my dome whenever I pointed east. Since the shielding I can now see with the unaided eye to 4.5 mag. visually from my backyard in the city. I can obtained 19th magnitude stars in 5 min. via CCD.
This is the first time in 10 years, that I actually can observe or image in less than 5 minutes on every clear night or even partly clear night, all without leaving my home!!!!. More Observing Time…..Astronomy Heaven is word I’m looking for…
I acquired the help of my friend Tom Bisque at Software Bisque for working out the necessary details in an automated system, Thanks to Tom and Software Bisque for the excellent software support! CCCSOFT, The SKY, T-POINT, Orchestrate, Remote Astronomy, Pocket Sky Software Bisque – Simply the BEST software on the Planet!!!
HomeDome Technical Innovations
Permanent domes for your dream observatory.